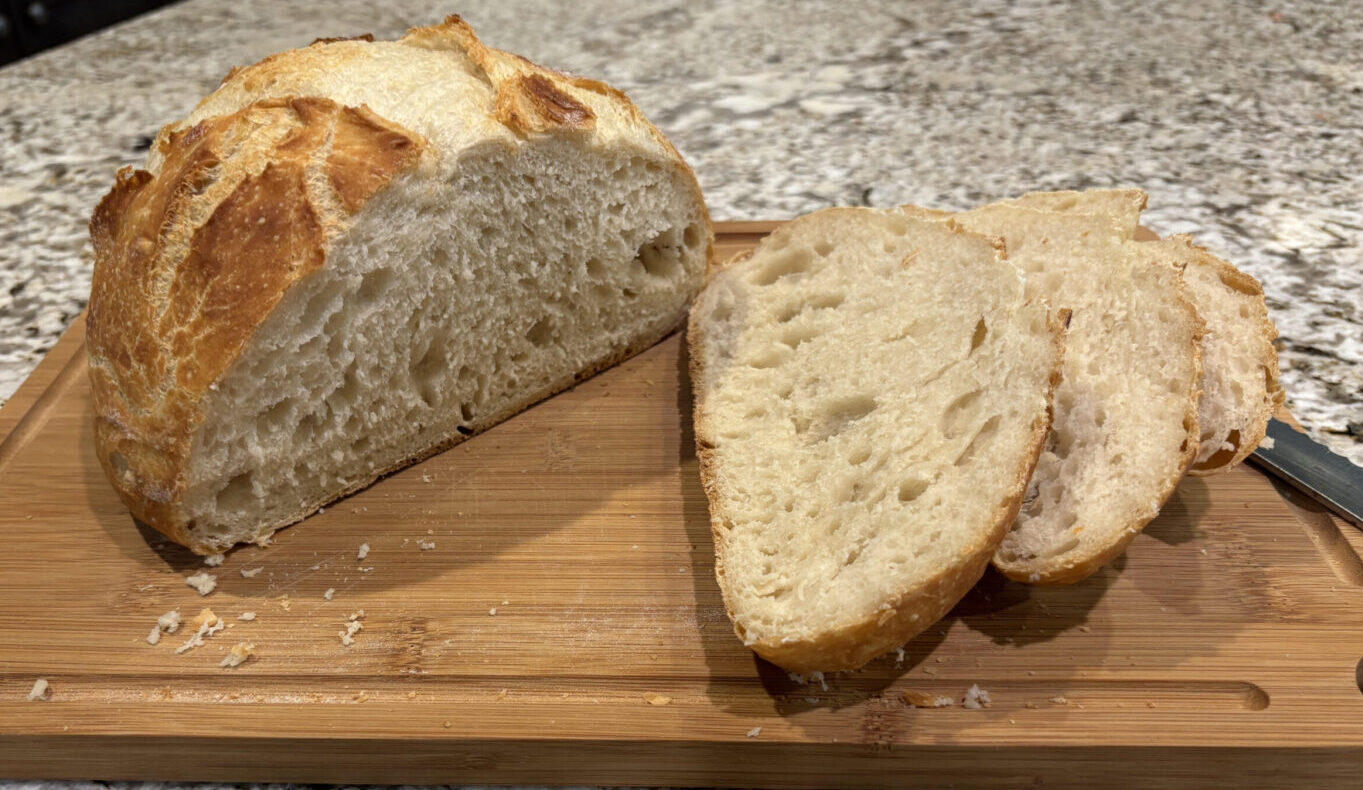
I used to be afraid of artisan bread. This no knead artisan bread is SO easy to make and literally requires NO kneading, whatsoever. I originally found this recipe on Recipe Tin Eats.
My husband loves my rolls, but he says this bread trumps them. The texture of this bread is so airy, yet holds up. It goes so good with just about anything. Soups, sandwiches, toast, just eating a slice because you can….the list is never ending. It also pairs great with my homemade honey butters.
Give it a try. This recipe is so forgiving and so easy for anyone who wants homemade bread without the commitment.
No Knead Artisan Bread
This is a sturdy, easy, yet airy bread that you will turn to again and again.
Servings: 1 loaf
Equipment
- 1 dutch oven with lid
- 1 medium/large glass or metal bowl
- 1 silicone bread sling
Ingredients
- 1 1/2 cups warm water about 110℉
- 2 tsp Active Dry Yeast
- 1 tsp sugar
- 3 cups Bread Flour All purpose works in a bind
- 1 1/2 tsp kosher salt
Instructions
- In a large bowl, combine the warm water, 1 tsp sugar, and 2 tsp yeast. Stir to combine.
- Once combined, cover the bowl with a towel and allow to proof. You want it to start getting foamy before you do anything else so you know the yeast is active.
- Once proofed, add 3 cups flour and 1 1/2 tsp salt.
- Using a wooden spoon or spatula, stir to combine. You want the dough to be very sticky. Depending on how airy your flour was, you may need to add up to another 1/2 cup of warm water.
- Cover with cling wrap and leave on the counter for 2 – 3 hours until it doubles in volume. It’s should be wobbly like jelly and the top should be bubbly.
- Optional – refrigerate for flavor development: At this stage, you can either bake immediately (skip to Step 9) or refrigerate for up to 3 days.
- Take chilled dough out of the fridge – if you refrigerated your dough, leave the bowl on the counter for 45 – 60 minutes while the oven is preheating. Cold dough does not rise as well.
- Preheat oven – Put your dutch oven in the oven with the lid on (10" or larger). Preheat to 450°F for 30 minutes prior to baking.
- Five minutes before your dutch oven is fully heated, shape your dough. Sprinkle work surface with 1 tbsp flour, scrape dough out of bowl. Sprinkle top with 1/2 tbsp flour.
- Using a dough scraper or anything of similar shape (cake server, large knife, spatula), fold the sides inwards (about 6 folds) to roughly form a roundish shape. Don’t be too meticulous – you’re about to deform it, it’s more about deflating the bubbles in the dough and forming a shape you can move.
- Transfer to parchment paper or silicone sling: Slide a large piece of parchment/baking paper (not wax paper) or sling next to the dough, then flip the dough upside down onto the paper (ie seam side down, smooth side up). Slide/push it towards the middle, then reshape it into a round(ish) shape. Don't get too hung up about the shape. Lopsided = more ridges = more crunchy bits!
- Remove the piping hot dutch oven from oven. Use paper or sling to place the dough into pot, then put the lid on and place back in the oven.
- Bake for 30 minutes covered, then 10-12 minutes uncovered or until deep golden and crispy.
- Remove from dutch oven and cool on a rack for at least 10 minutes before slicing.
This should be stickier than roll or normal bread dough. It should be sticking to the sides. If it isn't, add more water and stir to combine. If it's too liquid-y add more water.